How to Make Wine at Home
A Complete Beginner's Guide
Home winemaking is simpler than most people think. The basic process is: clean everything, ferment fruit sugar with yeast, rack it off the sediment, let it clear and age, then bottle. That is it. If you can follow a recipe and be patient, you can make wine.
This guide walks you through a solid beginner method that works for grape wine, fruit wine, or even store-bought juice. No fancy equipment, no chemistry degree required.
What You Need
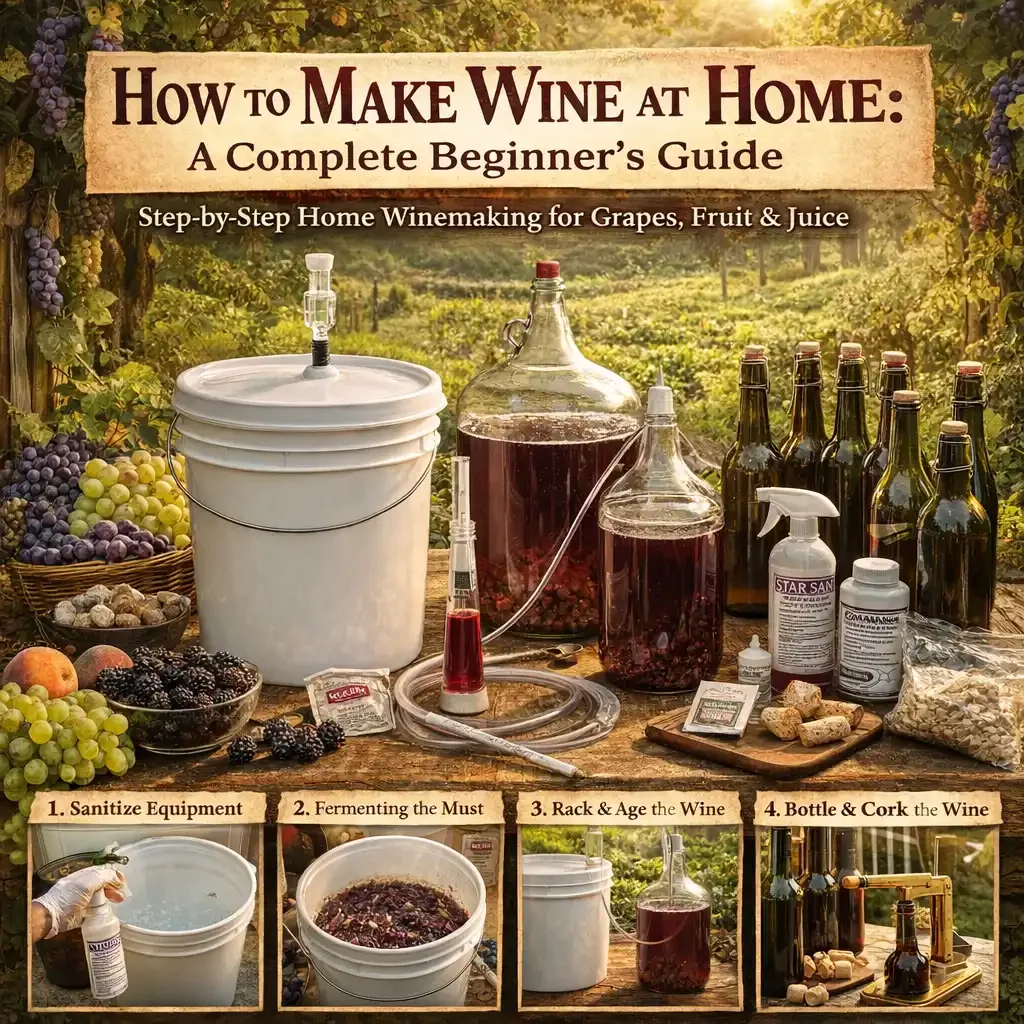
Food grade fermenter. A plastic bucket works great for primary fermentation, and a glass carboy is ideal for aging.
Airlock and bung. This lets CO2 escape during fermentation while keeping air and bugs out.
Siphon tubing and racking cane. An auto siphon makes the racking process much easier. You will use this to transfer wine off the sediment without disturbing it.
Sanitizer. Star San or a similar no-rinse sanitizer. This is the single most important supply you will buy.
Hydrometer. This measures the sugar level in your wine so you know when fermentation starts and when it is finished. It also lets you calculate alcohol content.
Bottles and corks (or swing tops). You can reuse commercial wine bottles. Swing top bottles are the easiest option for beginners since you do not need a corker.
Ingredients (for 1 Gallon / 3.8 L)
Fruit or juice. The easiest option is 1 gallon of 100% juice with no preservatives like potassium sorbate (this will kill yeast and prevent fermentation). Alternatively, use 3 to 4 pounds of crushed fruit plus water to make up 1 gallon.
Wine yeast. Lalvin EC-1118 is very forgiving and a great choice for beginners. It ferments reliably across a wide temperature range and tolerates high alcohol levels.
Yeast nutrient. Recommended. This gives the yeast the minerals and nitrogen they need to ferment cleanly rather than producing off flavors.
Sugar (optional). You may need to add sugar to raise the alcohol potential, depending on how sweet your fruit or juice is. Your hydrometer will tell you.
Campden tablet (optional). A sulfite tablet that protects your wine from oxidation and kills wild microbes before you pitch your yeast.
Steps
1. Sanitize everything.
Anything that touches the wine after it cools or after fermentation starts must be sanitized. This is the most important step in the entire process. Poor sanitation is the number one cause of failed batches, off flavors, and vinegar.
2. Make the must.
If using juice, simply pour it into your fermenter. If using fruit, crush the fruit, add it to the fermenter, and add water to reach your target volume.
Check the sugar level with your hydrometer. A common target is a starting gravity of 1.085 to 1.095, which will produce roughly 11% to 13% alcohol.
3. Add yeast.
If you are using whole fruit, many winemakers add 1 crushed campden tablet first, then wait 12 to 24 hours before adding yeast. This gives the sulfite time to knock out wild bacteria and yeast before your chosen yeast takes over.
Add your yeast nutrient, then pitch the yeast. You should see signs of fermentation (bubbling, foam on the surface) within 12 to 48 hours.
4. Primary fermentation (5 to 10 days).
Keep the fermenter at about 65 to 75 F. If you used whole fruit, stir once daily to keep the fruit cap wet and prevent mold from forming on the surface.
When bubbling slows noticeably and your hydrometer reads near 1.010 or lower, it is time to move on to secondary.
5. Rack to secondary (aging vessel).
Siphon the wine off the sediment into a clean, sanitized carboy. Try to leave as much sediment behind as possible without losing too much wine. Attach your airlock and let it finish fermenting and start clearing.
6. Wait and rack again.
After 2 to 4 weeks, rack off the sediment again into another clean carboy. Repeat every month or two until the wine is clear and there is very little sediment forming at the bottom. Patience here makes better wine.
7. Stabilize (optional).
If you want a sweet finished wine, you must stabilize before adding sugar back (called back sweetening), or the yeast will restart fermentation in the bottle. The typical method is to add sulfite plus potassium sorbate, both available at any wine supply store.
8. Bottle.
Only bottle when the gravity has been stable for at least 1 to 2 weeks and the wine is clear. If you bottle while fermentation is still active, you will create pressure inside the bottles and potentially pop corks or even break glass.
Age in the bottle for at least a few months. Most wines improve significantly with time. Six months is a common target for fruit wines. A year or more is even better for grape wines.
Two Big Beginner Mistakes to Avoid
Not sanitizing well. This is by far the most common mistake. Bad sanitation causes off flavors, funky smells, and can turn your wine into vinegar. When in doubt, sanitize it again.
Bottling too early. If fermentation is not completely finished, the remaining yeast will continue producing CO2 inside the sealed bottle. This creates pressure that can pop corks or, in the worst case, shatter bottles. Always confirm with your hydrometer that gravity has been stable for at least two weeks before bottling.
What Kind of Wine Do You Want to Make?
This guide gives you the framework, but the exact recipe will depend on what fruit you are working with and how many gallons you want to make. Grape wine, blackberry, muscadine, pomegranate, apple, and dozens of other fruits all work beautifully with this same basic method. The main variables are the amount of fruit, the sugar target, and the yeast strain.
Pick your fruit, grab your equipment, sanitize everything, and get started. Your first batch will not be perfect, but it will be yours, and the second batch will be better.